Flash photography is a skill. It is more than just pointing your phone's camera at something and then snapping a photo. This is because while our smartphones have flash units that have improved leaps and bounds massively since they were first introduced, they're still not necessarily that great.
This is because unlike proper flash units that can be angled and diffused, the flash units on our phones are direct and harsh. If you're trying to create that effect, that's fine, but otherwise, flash can sometimes ruin a photo and in cases more often than not, it can give your subject the dreaded red-eye effect.
Best Android phone for taking photos
So the question is, how do you take photos in low-light situations without flash? It's actually quite simple and with a few tweaks, you can coax out better-looking photos in the dark without having to use flash.
How to use your smartphone's manual mode
A lot of smartphones these days come with native camera apps that offer up a manual mode. With manual mode, it gives users more control over their phone's cameras and individual settings in order to get the shot that they want, and here are some of the changes you can make to improve photos in low-light scenarios without having to use flash.
Exposure Compensation
 Exposure compensation, also referred to as EV, basically lets you adjust how much light is let into the sensor. Camera apps in auto mode attempt to measure this by default, but sometimes it isn't always ideal. Sometimes it might let more light in than you like, or sometimes it might be too dark.
Manually tweaking the EV values can help boost the light in your photos, where bumping it to a higher value will result in brighter images.
Shutter Speed
 Shutter speed determines how long your shutter stays open when you snap a photo. If you've ever wondered how some photographers can capture such bright shots of the night sky, shutter speed is one of those adjustments they make. By allowing the shutter to stay open longer, more light can be let into the sensor, which in turn results in brighter photos.
Note that by extending the length of your shutter speed, it means that you might need a tripod for your phone's camera, or place it on a stable surface. This is because any movement captured while the shutter is still open will result in blurry photos.
ISO
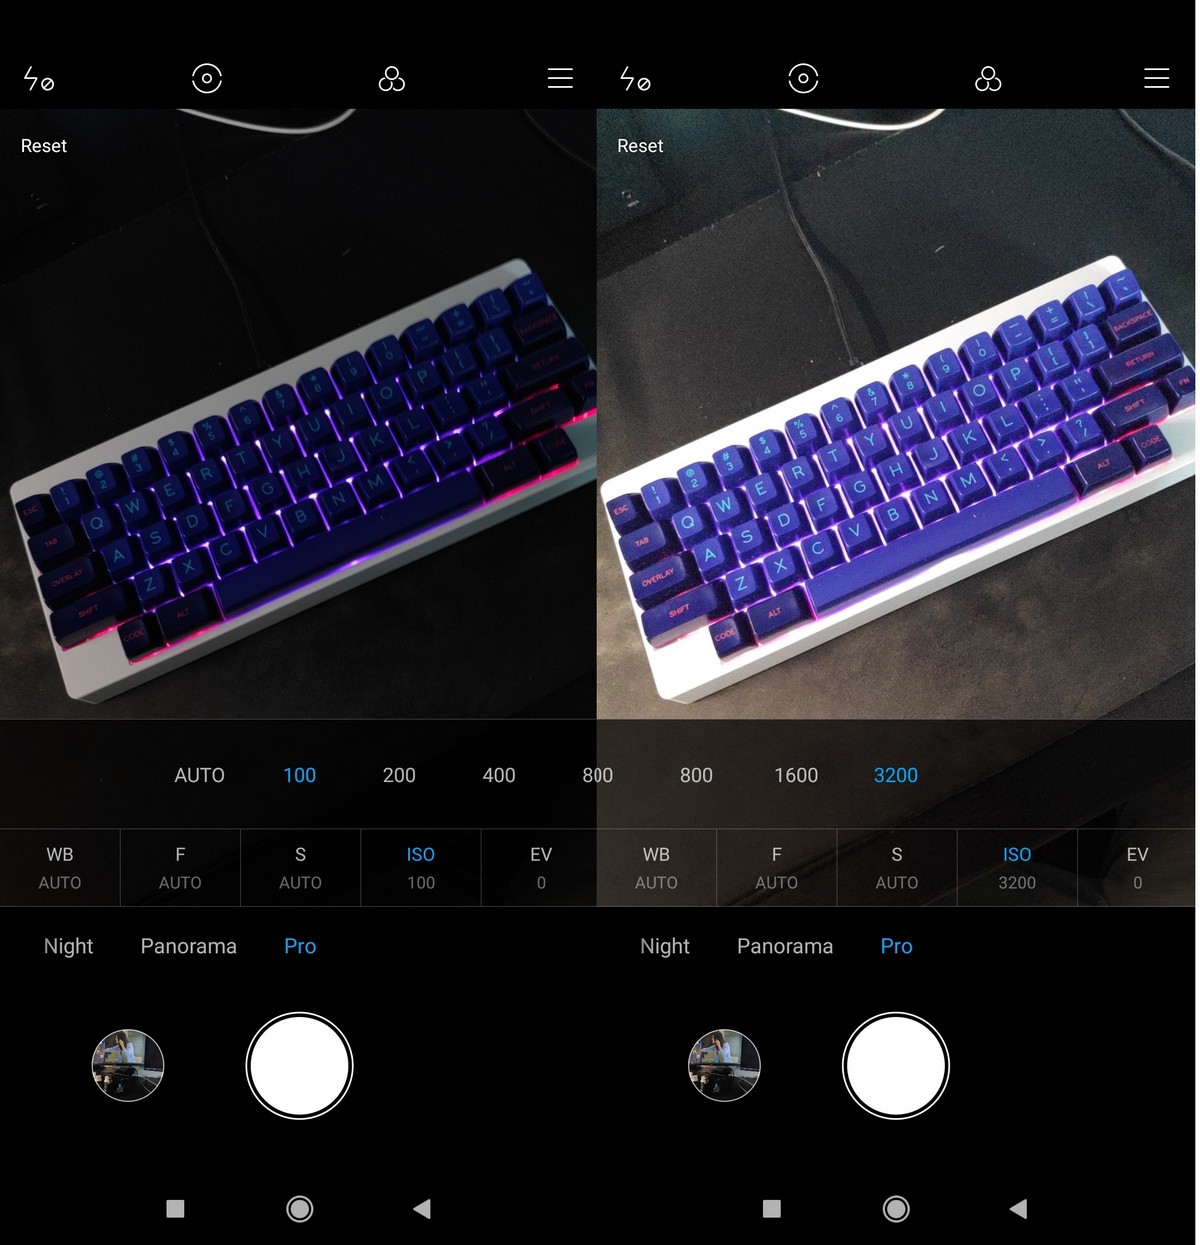 ISO changes the sensitivity of your phone's camera sensors. Similar to EV and shutter speed in auto mode, ISO is automatically determined by the camera software to find the right balance for the particular shot, but as we said, sometimes it isn't always ideal.
You can increase the ISO to help take brighter photos or lower it if the photos you take are too bright. Increasing the ISO basically lets your phone's camera capture light faster, but we should warn you that setting an ISO that is too high will result in your photos being too "noisy" and having a very grainy effect.
Sometimes this can be done on purchase to achieve a particular look, but other times too much noise and grain can make a photo unusable.
White Balance
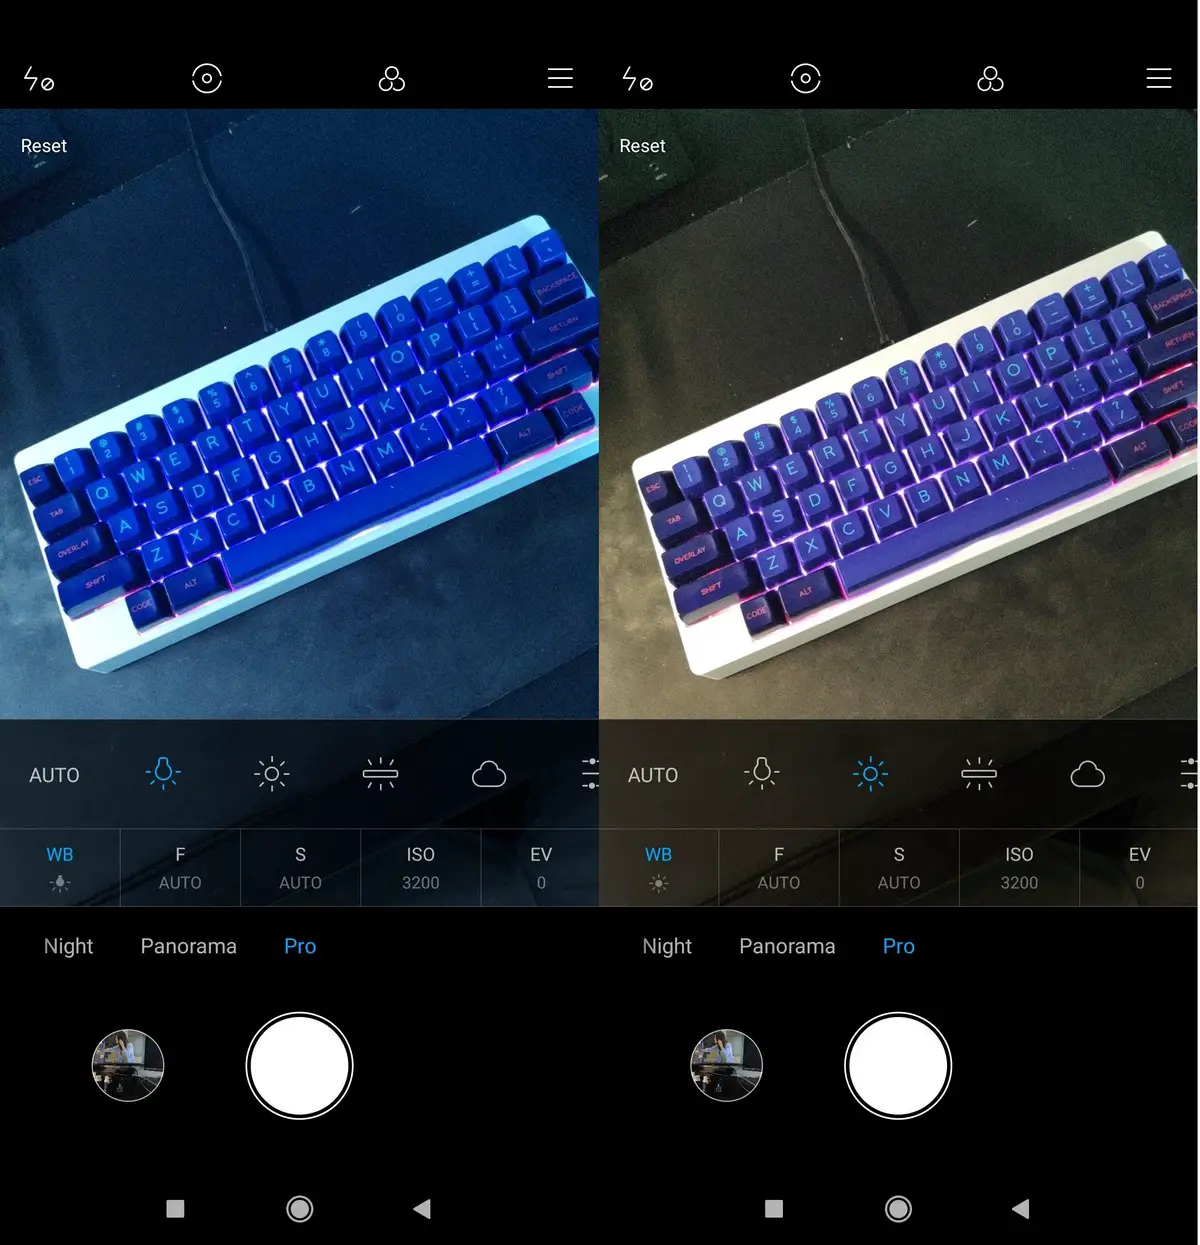 Adjusting your phone's white balance is more about adjusting the color temperature of your photos. If you've ever shot a photo and noticed that it looks too orange or too blue, then adjusting your white balance will correct that.
As we said, white balance is mostly about adjusting the color temperature of your photos, but in some cases, it can actually help to brighten up a photo. For example, if you're shooting outdoors on a cloudy day, you might want to make sure that the white balance setting you've chosen is for cloudy/overcast scenarios, which can help improve on the overall look of the photo without turning the flash on.
Change the focal point
Our phone cameras come with the ability to automatically detect subject matter. This is useful and takes out a lot of the guesswork, but sometimes it can result in photos that are too dark or too overblown. By manually changing the focal point of your phone's camera, you can also change how bright or dark the photo is.
For example, if your subject is standing in front of a light source like an open window, tapping on your subject to focus on it can reduce the glare. Alternatively, if you're in a dimly-lit room, you can tap on objects that are darker to force your camera to automatically compensate for the lower light.
from Phandroid https://ift.tt/3hr8tJs
via IFTTT
No comments:
Post a Comment