The Samsung Galaxy S20 lineup comes in three variations, with many of us settling with either the standard S20 or the S20 Plus. But if you just picked up your S20, you'll want to know where to get started. Well, we've got you covered and here are the first things every Samsung Galaxy S20 user should do.
Lock your phone with biometric security
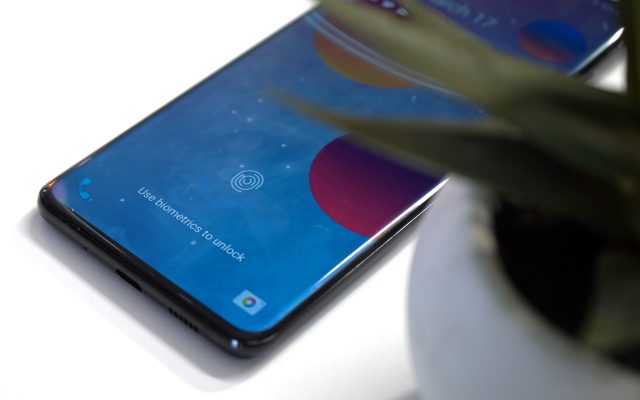
The great thing about many smartphones in 2020 is that there are multiple ways to keep your device locked so it remains private to you. With the Galaxy S20 lineup, there are a few ways to do this, including the ultrasonic fingerprint scanner along with the less-secure iris scanning. If you bypassed this during the initial set up, then here's how you can set up the Biometrics on your S20:
- Open the Settings app.
- Scroll down and select Biometrics and security.
- Tap Face Recognition.
- Follow the steps and save.
- Go back to the main page.
- Tap Fingerprints.
- Follow the steps and save.
One thing to make note of, and this has been true for many devices, you might want to register your fingerprint multiple times. This helps to improve the overall accuracy, and of course, adding your thumbprint from both your dominant and non-dominant hands will make it easier to unlock in a jiffy.
Take advantage of the new gestures (or go old school)
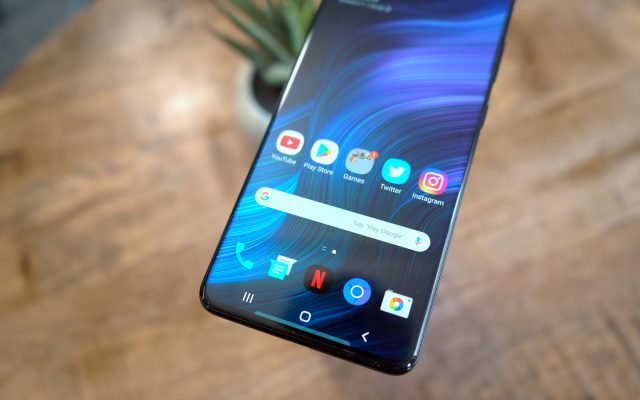
Now that screen real-estate is more important than ever with these big and beautiful displays, you may not want to have a portion of the screen taken up by the old-school navigation bar. Samsung has implemented gestures across the board in order for you to quickly navigate around your Galaxy S20 without tapping buttons. Here's how you can get that set up:
- Open the Settings app.
- Tap on Display.
- Scroll down and select Navigation bar.
- Tap the icon next to Full-screen gestures.
- Change Button order, if you desire.
There is one disappointing aspect of the new gestures, as Samsung has not enabled them to be compatible with third-party launchers. So Nova or Lawnchair users will be able to activate them, but not all of the options will be available and the experience is less-than-great. But if you're okay with using Samsung's launcher, this won't matter as much.
Switch to Dark Mode to save battery life

Nobody wants to wake up early in the morning, unlock their phone, and get blinded by a bunch of bright and white screens everywhere. Dark Mode is available on the S20 and you can even set a schedule if you don't want it enabled all of the time.
- Open the Settings app.
- Tap on Display.
- Tap Dark on the right-hand side.
- Select Dark mode settings
Diving deeper into the Dark Mode Settings, you'll find the ability to turn this on according to a specific schedule, or just from sunset to sunrise. However, you will be prompted to grant location data in order for your phone to know when it's time to activate Dark Mode. You can also have this applied to your wallpaper, along with the ability to enable the Blue Light filter (Adaptive Color Filter) automatically between sunrise and sunset. Your eyes will definitely thank you for this.
Turn on 120Hz refresh rate
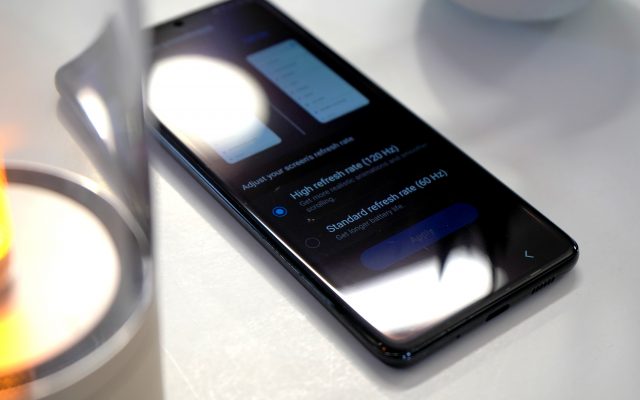
One of the key features of the S20 isn't the new Snapdragon processor or the increased amount of RAM. Nope, it's all about the display and with the S20 you can enable the refresh rate to go up to 120Hz. The S20 comes with two refresh rates available, giving users the option to go between either 60Hz (what you are used to) and 120Hz.
- Open the Settings app.
- Tap on Display.
- Select Motion smoothness.
- Tap High refresh rate (120Hz)
- Tap Apply.
The settings panel for adjusting the refresh rate gives you an example of the difference that will be applied if you choose 60Hz or 120Hz. The only catch here is that you won't be able to take advantage of the WQHD+ (3200 x 1440) offered by the S20. Instead, if 120Hz is enabled, your phone will be "locked" to FHD+ (2400 x 1800). It makes sense to do this as having the highest display resolution paired with the fastest refresh rate will mean the shortest battery life you've ever experienced.
Accessorize your S20
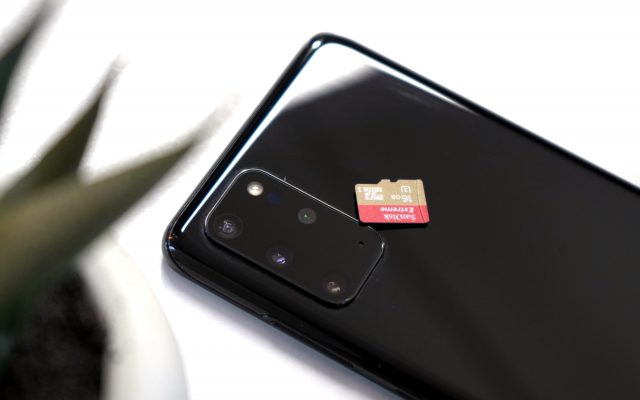
Accessories are a fun part of getting a new device, regardless of whether it's a phone, tablet, or new PC. We have rounded up some of our favorite accessories that will pair perfectly with your S20 and give you a more enjoyable experience.
- Best Cases
- Best microSD Card
- Best Headphones
- Best Charger
- Best Smartwatch/Fitness Tracker
Turn off Bixby for good

Bixby has been a source of frustration for just about anyone who has used it over the years. While the experience itself is seamless, as it's integrated directly into your phone's software, Bixby just doesn't work as well for a smart assistant when compared to Google Assistant or even Siri. Nonetheless, Samsung continues to try to push it on users, including owners of the Galaxy S20. Here's how you can disable Bixby on your S20:
Disable the Bixby Button:
The first method we will explain to disable Bixby is through the disabling Bixby button. Starting last year, Samsung has merged its Power button and Bixby button, making it one that is present below the volume key. Therefore, it is really easy to turn off Bixby.
Steps to disable Bixby button are:
- From your home screen, move the notification bar down.
- In the next step from the quick settings, panel click on the Power Menu button.
- Once the power menu opens, look for the side key settings and tab on it. Or you can either hold the side key of the device to open side key settings.
- Power off the menu under the press-and-hold option by toggling it on. This can be done by making changes in the double press settings. Therefore, by holding the power button longer, it can lead to Quick Camera launch or open app.
- If you have selected an open app, press the cog button to choose an app that can open with a double press.
Disable Bixby Routines:
The last method we will explain involves the disabling of Bixby routines. Disabling Bixby routines can completely turn off the Bixby in Samsung. It is clear that once Bixby is a turnoff, its features won't work anyway.
Its steps include:
- Scroll down the notification bar from the home screen.
- Then click on Gear Icon.
- In the settings, please search for the Advance Features and tap on it.
- Move down to search for the Bixby routines and disable it from there.
Enable Always On Display to always show your notifications

The Always On Display is both great and not-so-great, depending on how much battery you need to last you throughout the day. But it's still a better option than your phone lighting up every, single, time a notification hits your phone. And in true Samsung fashion, you can customize and set this up to your liking from top to bottom. Here's how to get started.
- Open the Settings app.
- Tap Lock screen.
- Tap Always On Display.
Before even enabling the Always On Display, there is a slew of options for you to go through and customize so that your AOD looks exactly how you want it to.
- Tap to show – Show AOD for 10 seconds.
- Show always
- Show as scheduled – Set a schedule of when to show AOD.
- Clock style – Customize the clock that is shown, along with the color theme of the clock.
- Show music information – Shows details of the music playing when the FaceWidgets music controller is active.
- Rotate screen to – Switch between Portrait or Landscape mode when viewing AOD.
- Auto brightness
Take better pictures than ever before
Gone are the days of needing a dedicated point-and-shoot or DSLR camera to get the best pictures. Samsung's camera system is one of the best on the market, and with your Galaxy S20, you can customize the app to your liking.
- Open the Camera app.
- Tap the Gear icon in the top left-hand corner.
From the Camera Settings, you will find a slew of options to pick and choose from. This lets you keep the features you want while getting rid of the features you could care less about.
- Intelligent features
- Scene optimizer
- Shot suggestions
- Smart selfie angle
- Scan QR codes
- Pictures
- Swipe Shutter button to edge to
- Save options
- Videos
- Rear video size
- Front video size
- Advanced recording options
- Video stabilization
- Useful features
- Auto HDR
- Selfie tone
- Tracking auto-focus
- Pictures as previewed
- Grid lines
- Location tags
- Location tags
- Shooting methods
- Shutter sound
Control your S20 from your Windows PC
Usually, you have to worry about a lot of useless bloatware being pre-installed on your smartphones. But there's one piece of software that is rather useful, provided that you use a Windows PC. Link to Windows is a new integration for Samsung handsets and allows you to view notifications, reply to messages, and even control your smartphone's audio. Here's how to get it set up.
- Open the Settings app.
- Scroll down and select Advanced features.
- Tap Link to Windows.
- Follow the instructions.
You will need to be at your PC in order to finish the installation, as you need to confirm the pairing between your S20 and your computer.
Check out even more on the Galaxy S20

The Galaxy S20 continues to turn heads and will be a fan-favorite for at least the next year or two, until something better comes along. Can't get enough of the S20 and what it's capable of? Then check out Phandroid's other coverage of Samsung's early-2020 flagship.
- Samsung Galaxy S20+ Review
- Samsung Galaxy S20 & S20+ camera test
- 48 hours with the Samsung Galaxy S20+
- 25+ Samsung Galaxy S20 tips and tricks
- LG V60 versus Samsung Galaxy S20+
- Spec showdown: Samsung Galaxy S20 & S20+ vs Huawei P40 and P40 Pro
- Best Samsung Galaxy S20 Cases
- Best Chargers for the Samsung Galaxy S20
- How to SIM unlock the Samsung Galaxy S20 Ultra
- Why the Samsung Galaxy S20 Ultra is totally worth buying
from Phandroid https://ift.tt/3fgmyIp
via IFTTT
No comments:
Post a Comment